These adorable little gingerbread houses perch on the edge of a mug for a delightful presentation. I have included a recipe below courtesy of The Food Network, however here is my TIP! I used a mix from Betty Crocker! Yup! Just as tasty and super user friendly. So if you’re a purist, use this recipe otherwise see my link below for the Betty Crocker product. Regardless, I have given instructions on how to create these miniature houses below, as well as my royal icing recipe. Plus! I included a product link for “cookie cutter shapes” to create these adorable little houses if you don’t feel confident about your creative ability using a cardboard form!
Ingredients for gingerbread
1/2 cup (1 stick) butter, at room temperature
1/2 cup dark brown sugar
1/4 cup light molasses or dark corn syrup
1 tablespoon cinnamon
1 tablespoon ground ginger
1 1/2 teaspoons ground cloves
1 teaspoon baking soda
2 cups all-purpose flour
2 tablespoons water
Directions
-
- Gingerbread House: In a large mixing bowl, cream the butter, brown sugar, molasses, cinnamon, ginger, cloves and baking soda together until the mixture is smooth. Blend in the flour and water to make a stiff dough. Chill at least 30 minutes or until firm.
- Preheat oven to 375 degrees F.
Here is where my directions apply (whether using a mix or the above recipe)
Royal Icing
3 egg whites
1/2 tsp. cream of tartar
4 3/4 cup confectioners sugar
Beat the egg whites with the cream of tartar until frothy. Add the sugar in smaller amounts and incorporate well. Beat on high for about 4 minutes until thickened. Use immediately or cover with a damp paper towel and plastic wrap to avoid drying out.
Fill a pastry bag with a small decoration tip attached.
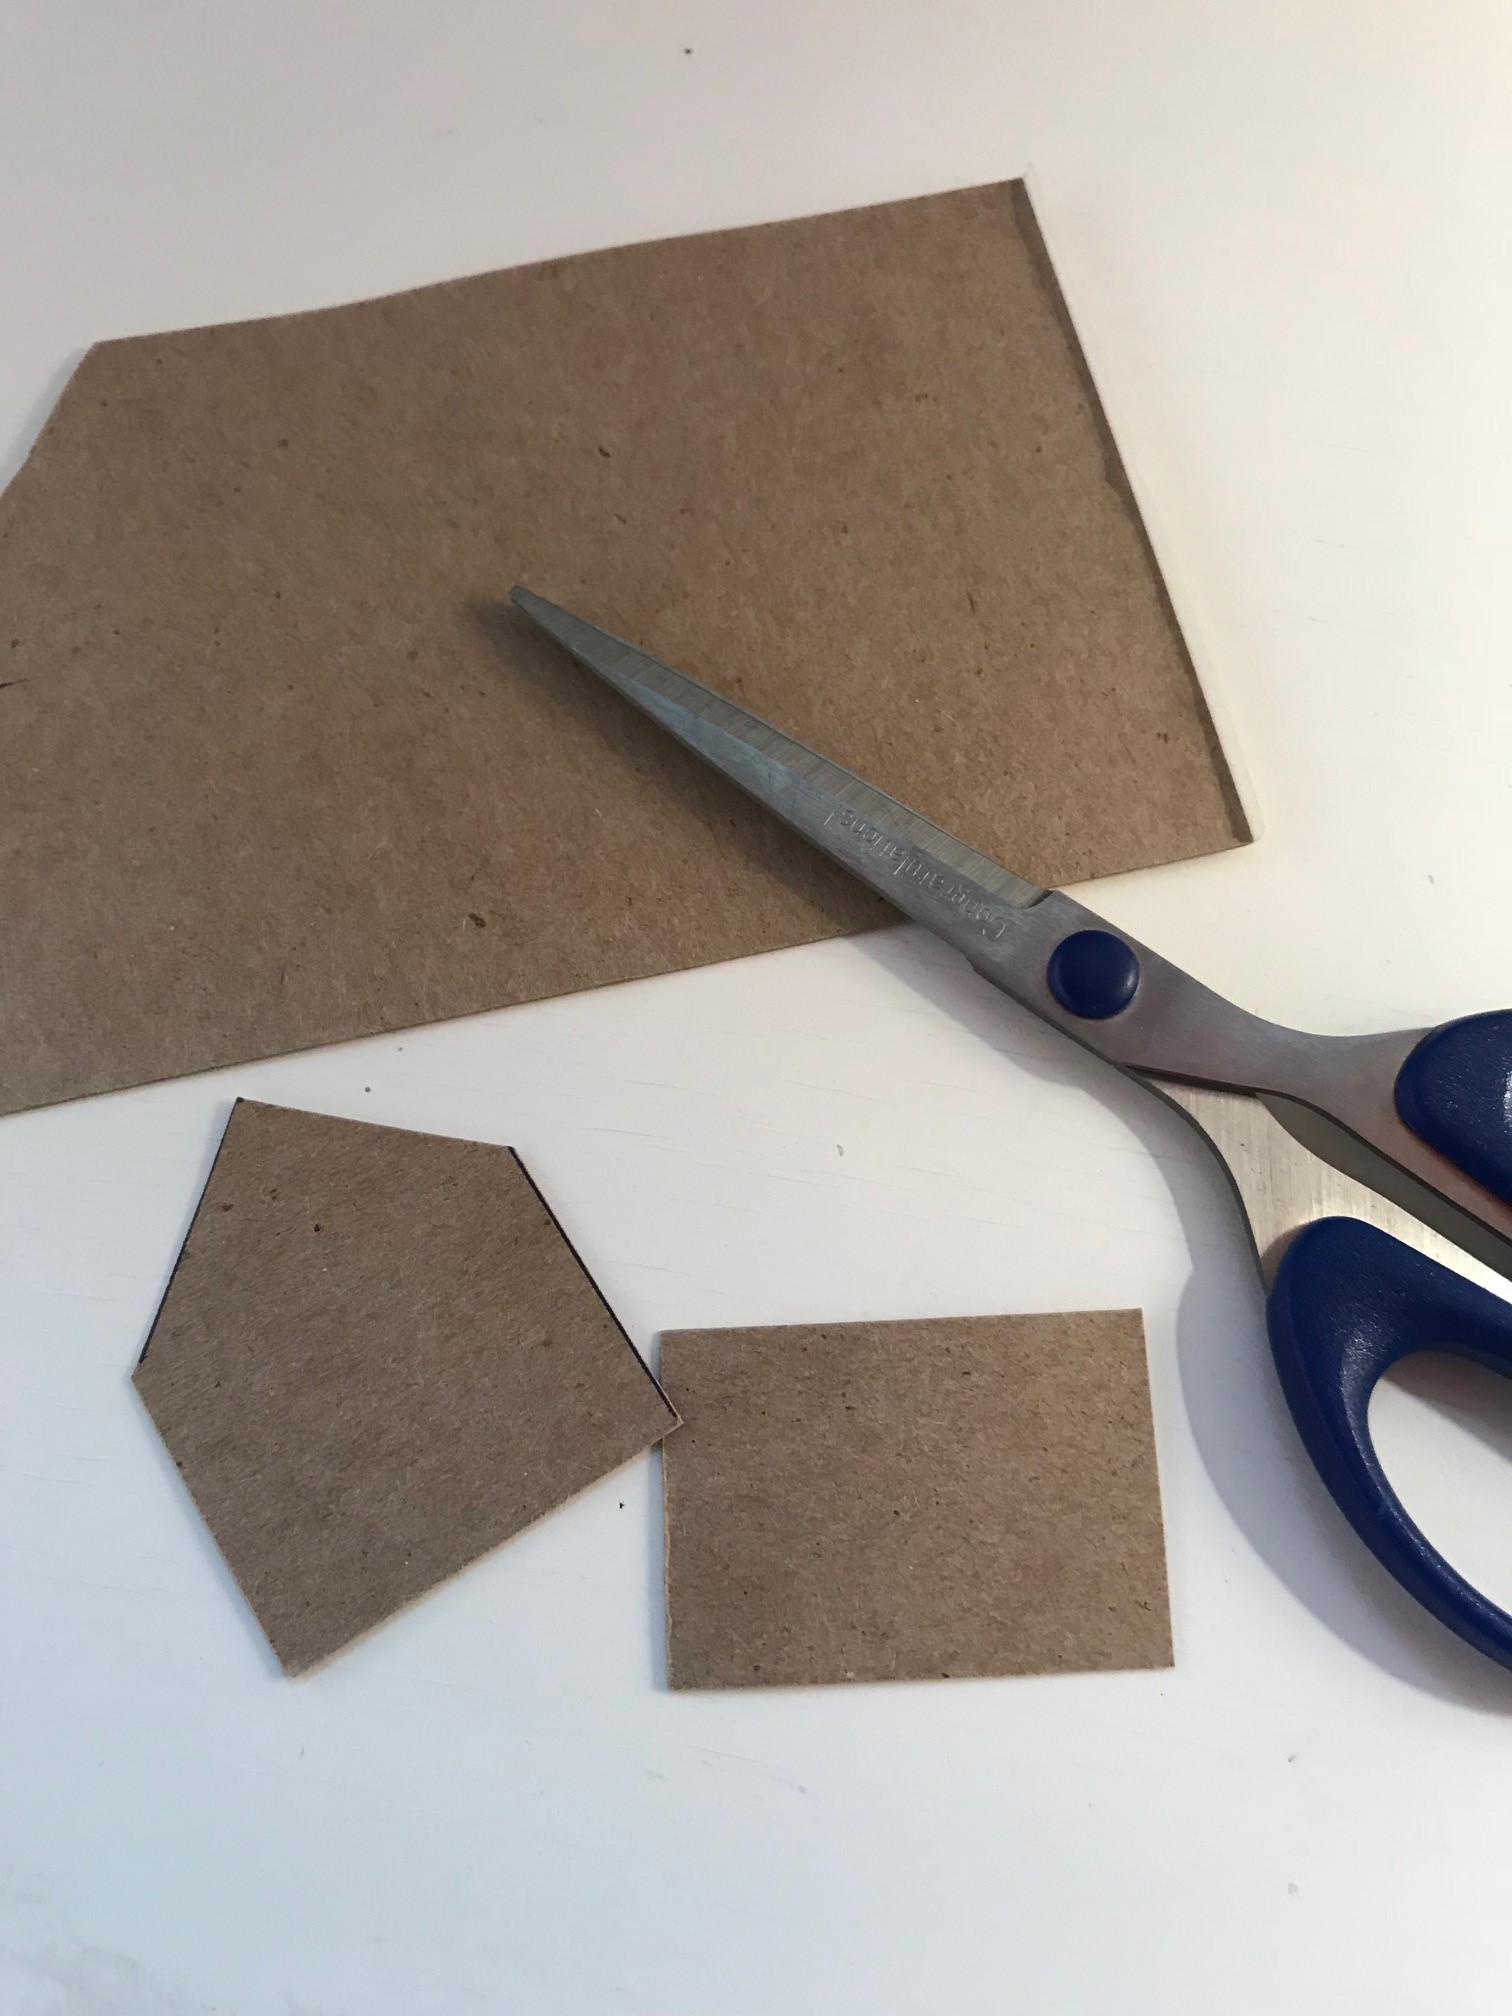
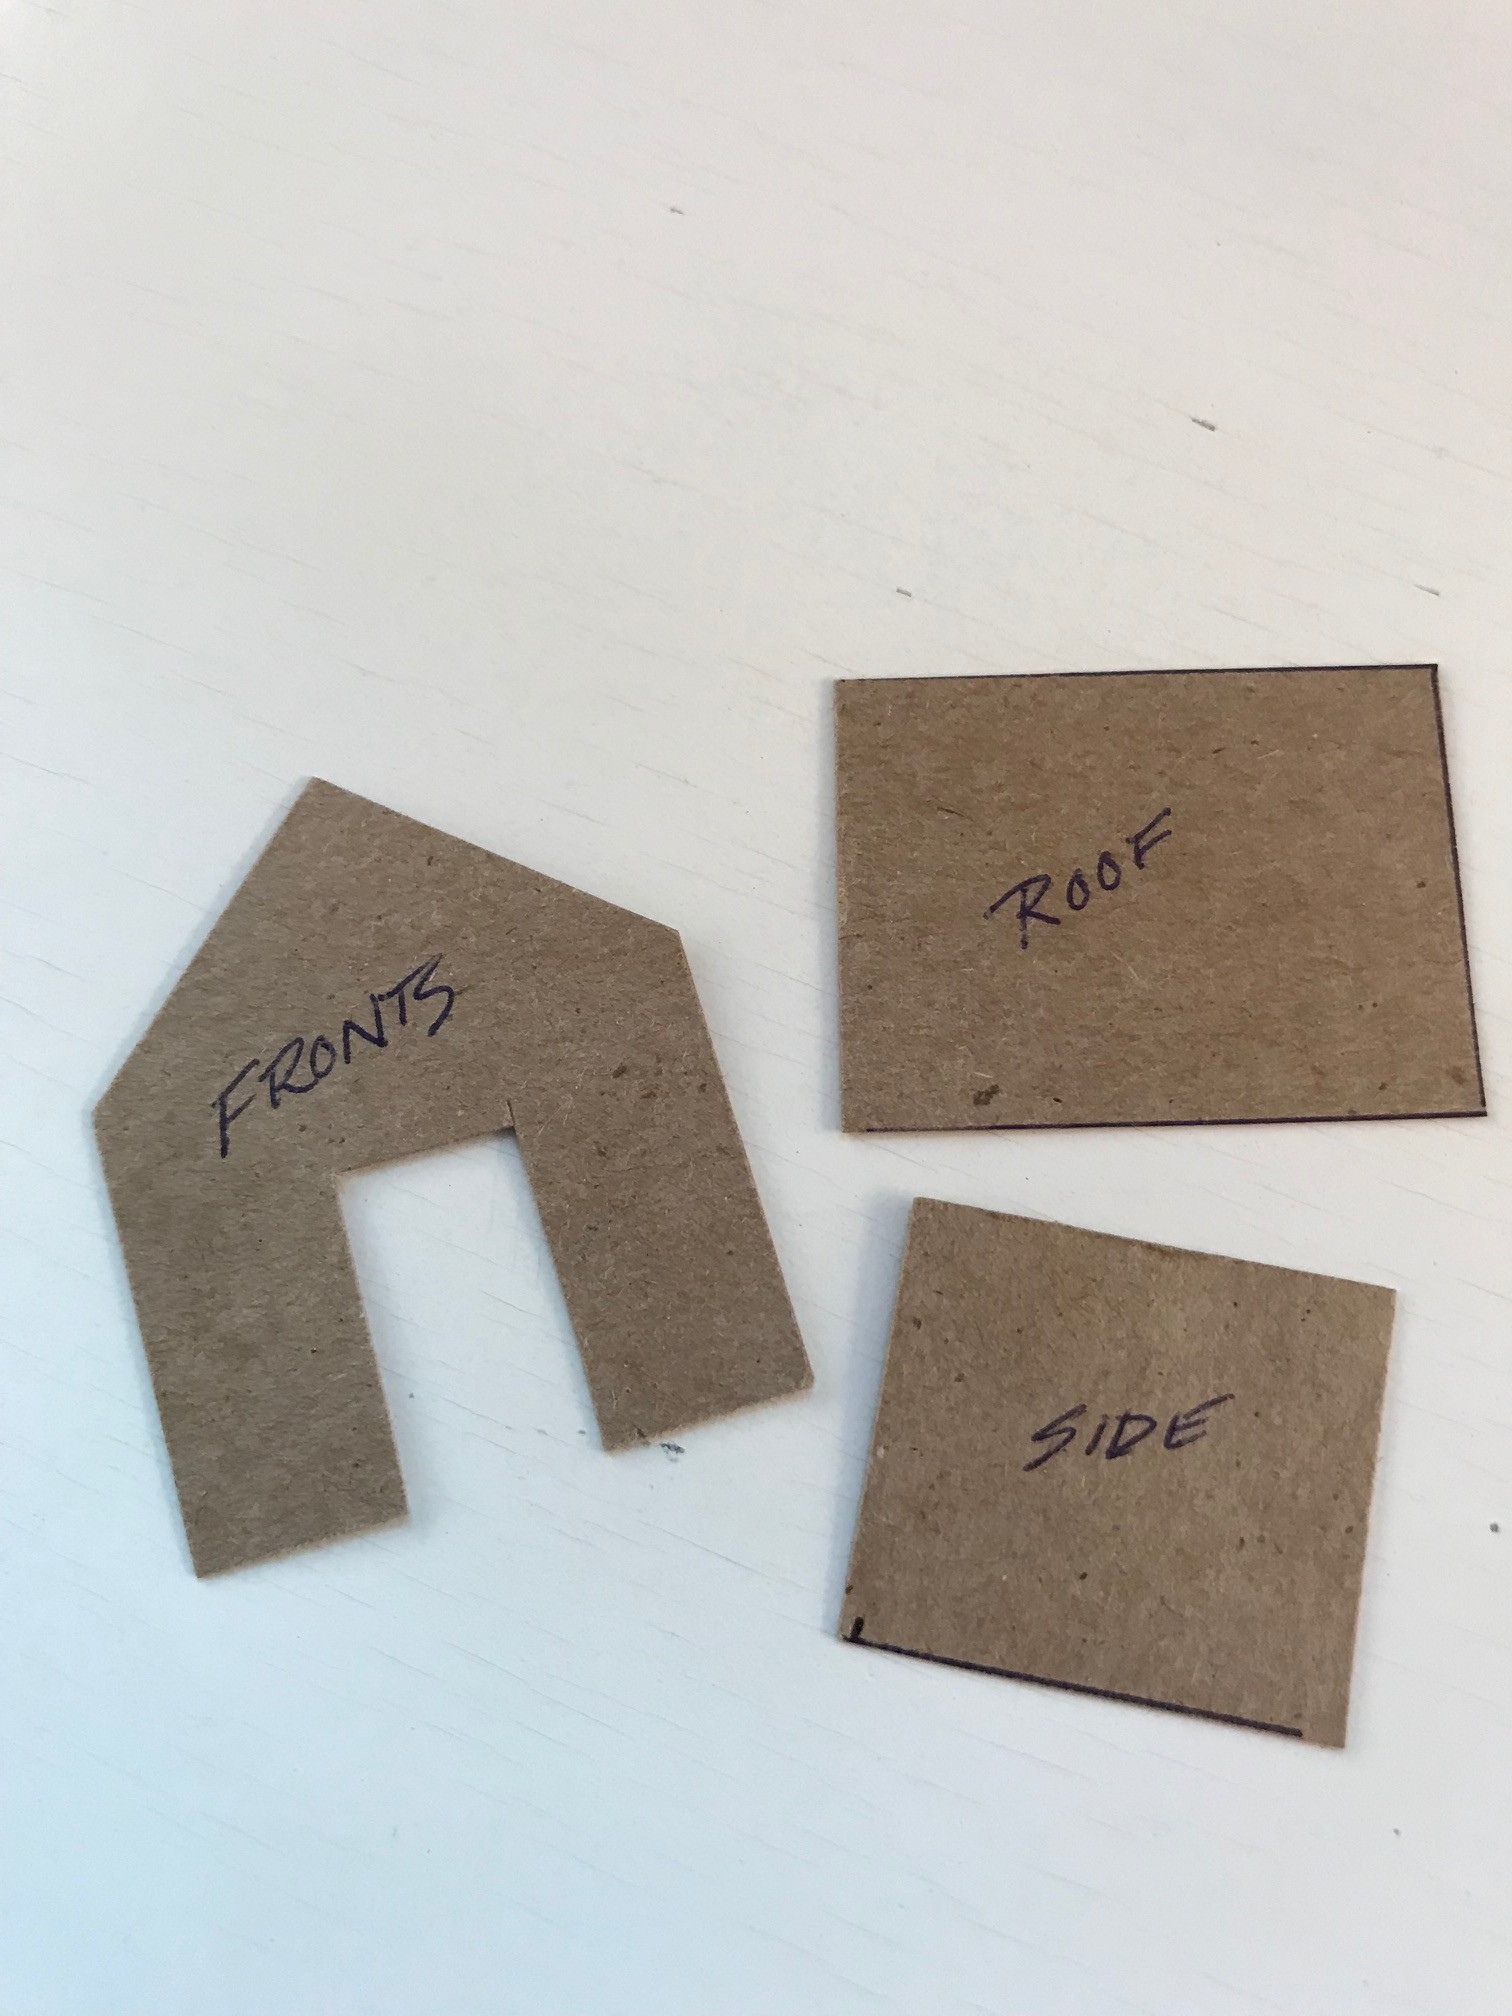
Make cardboard templates for the front, sides and roof. Try to stay in the 1 – 1 1/2″ range.
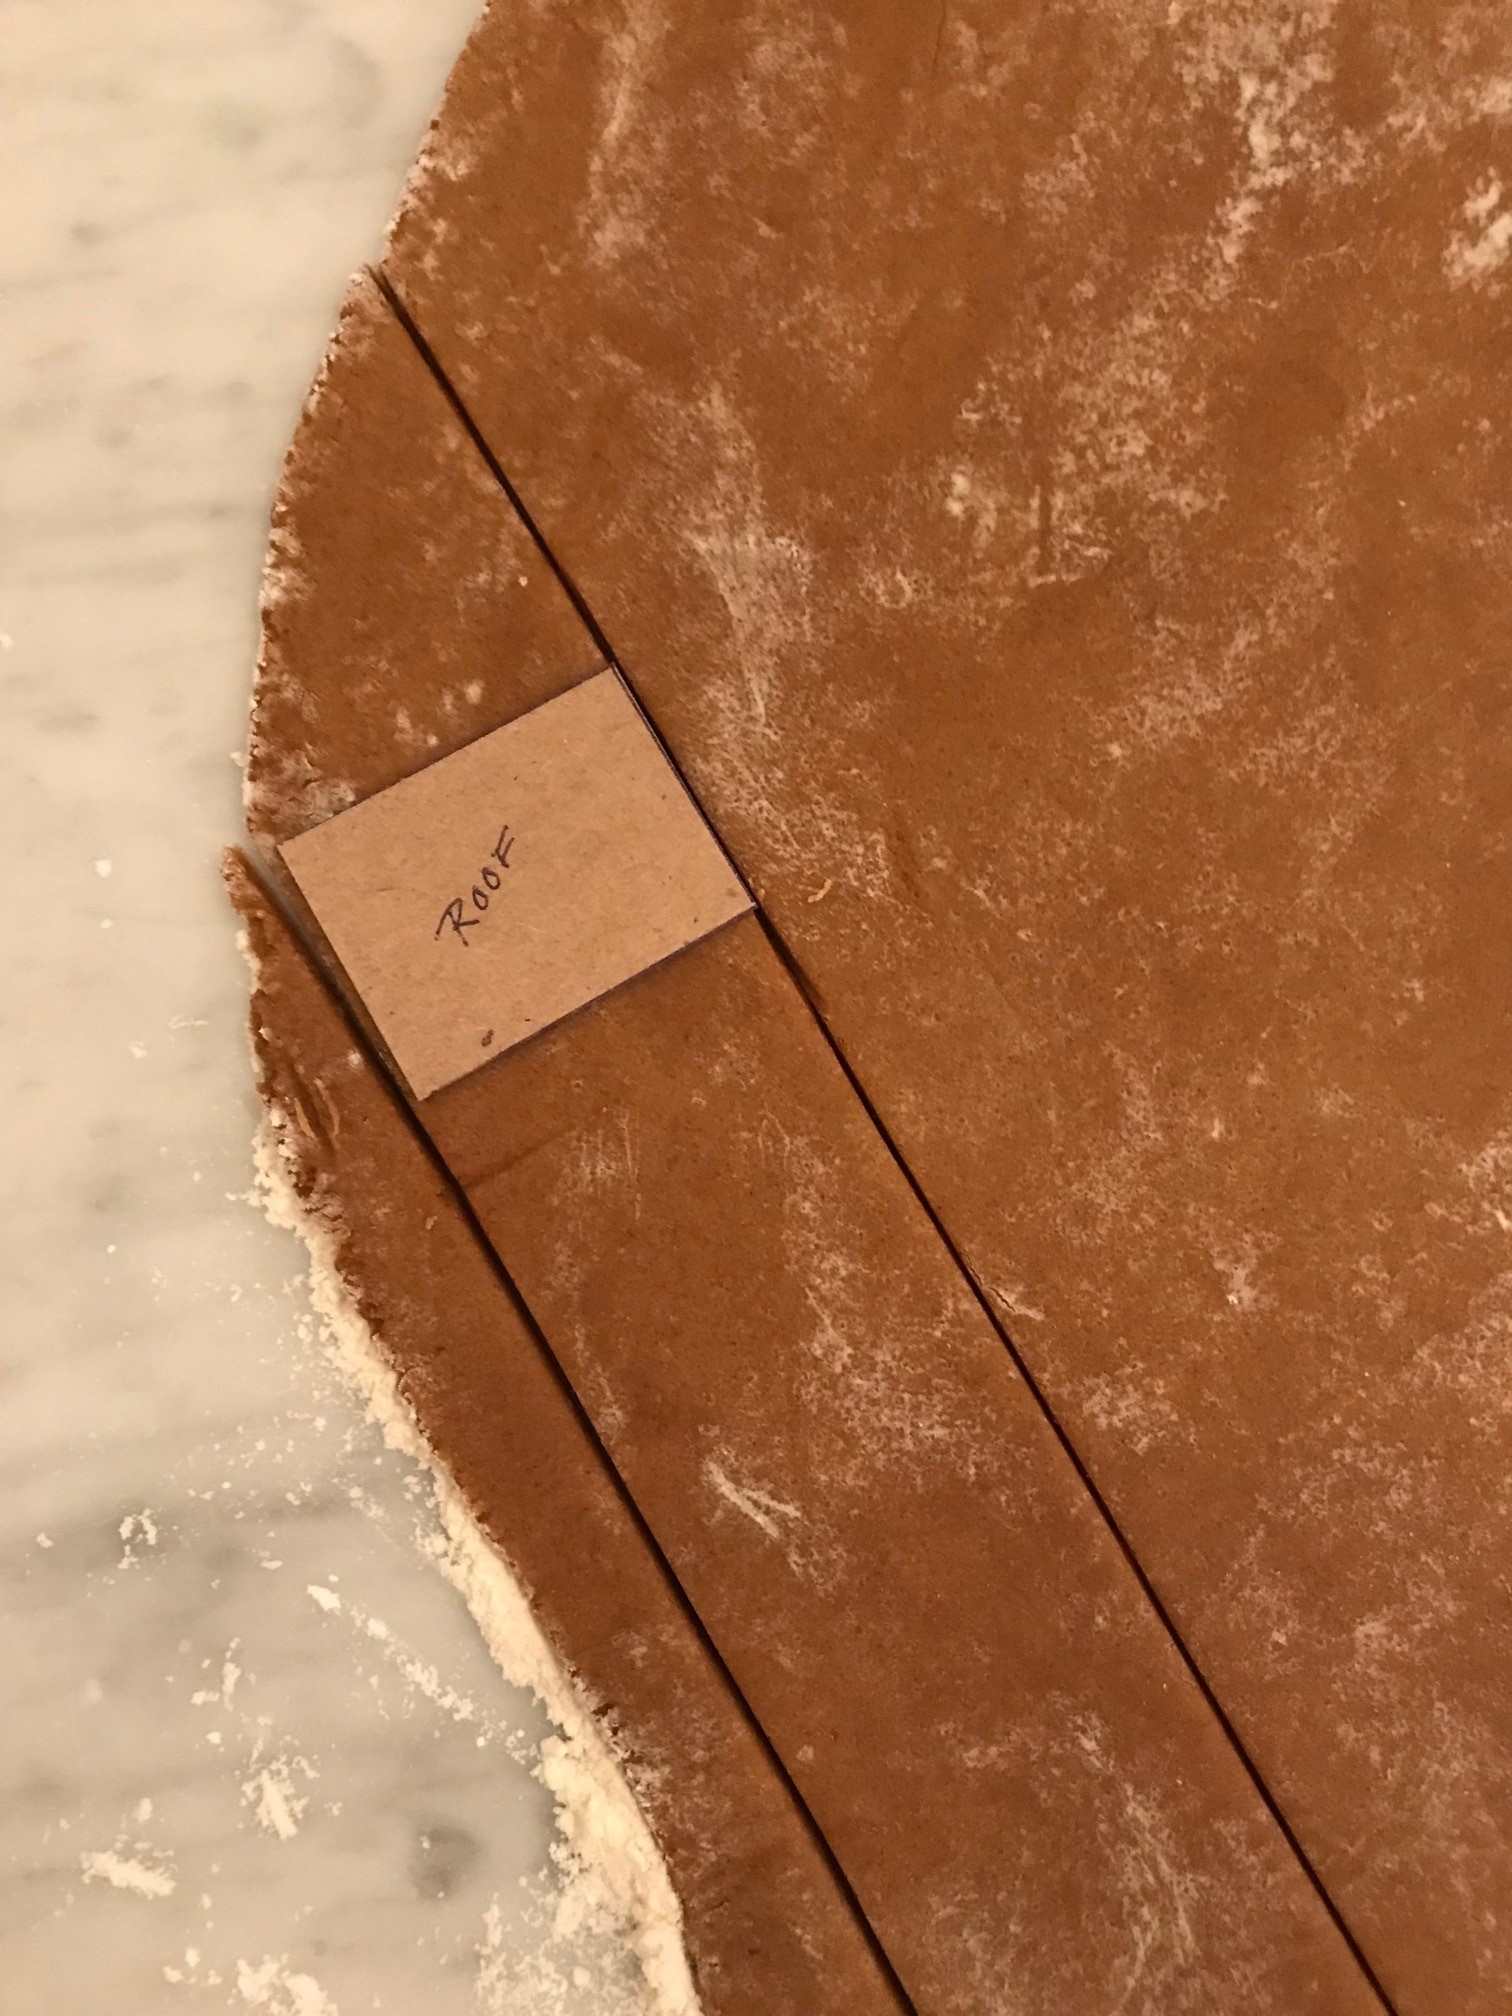
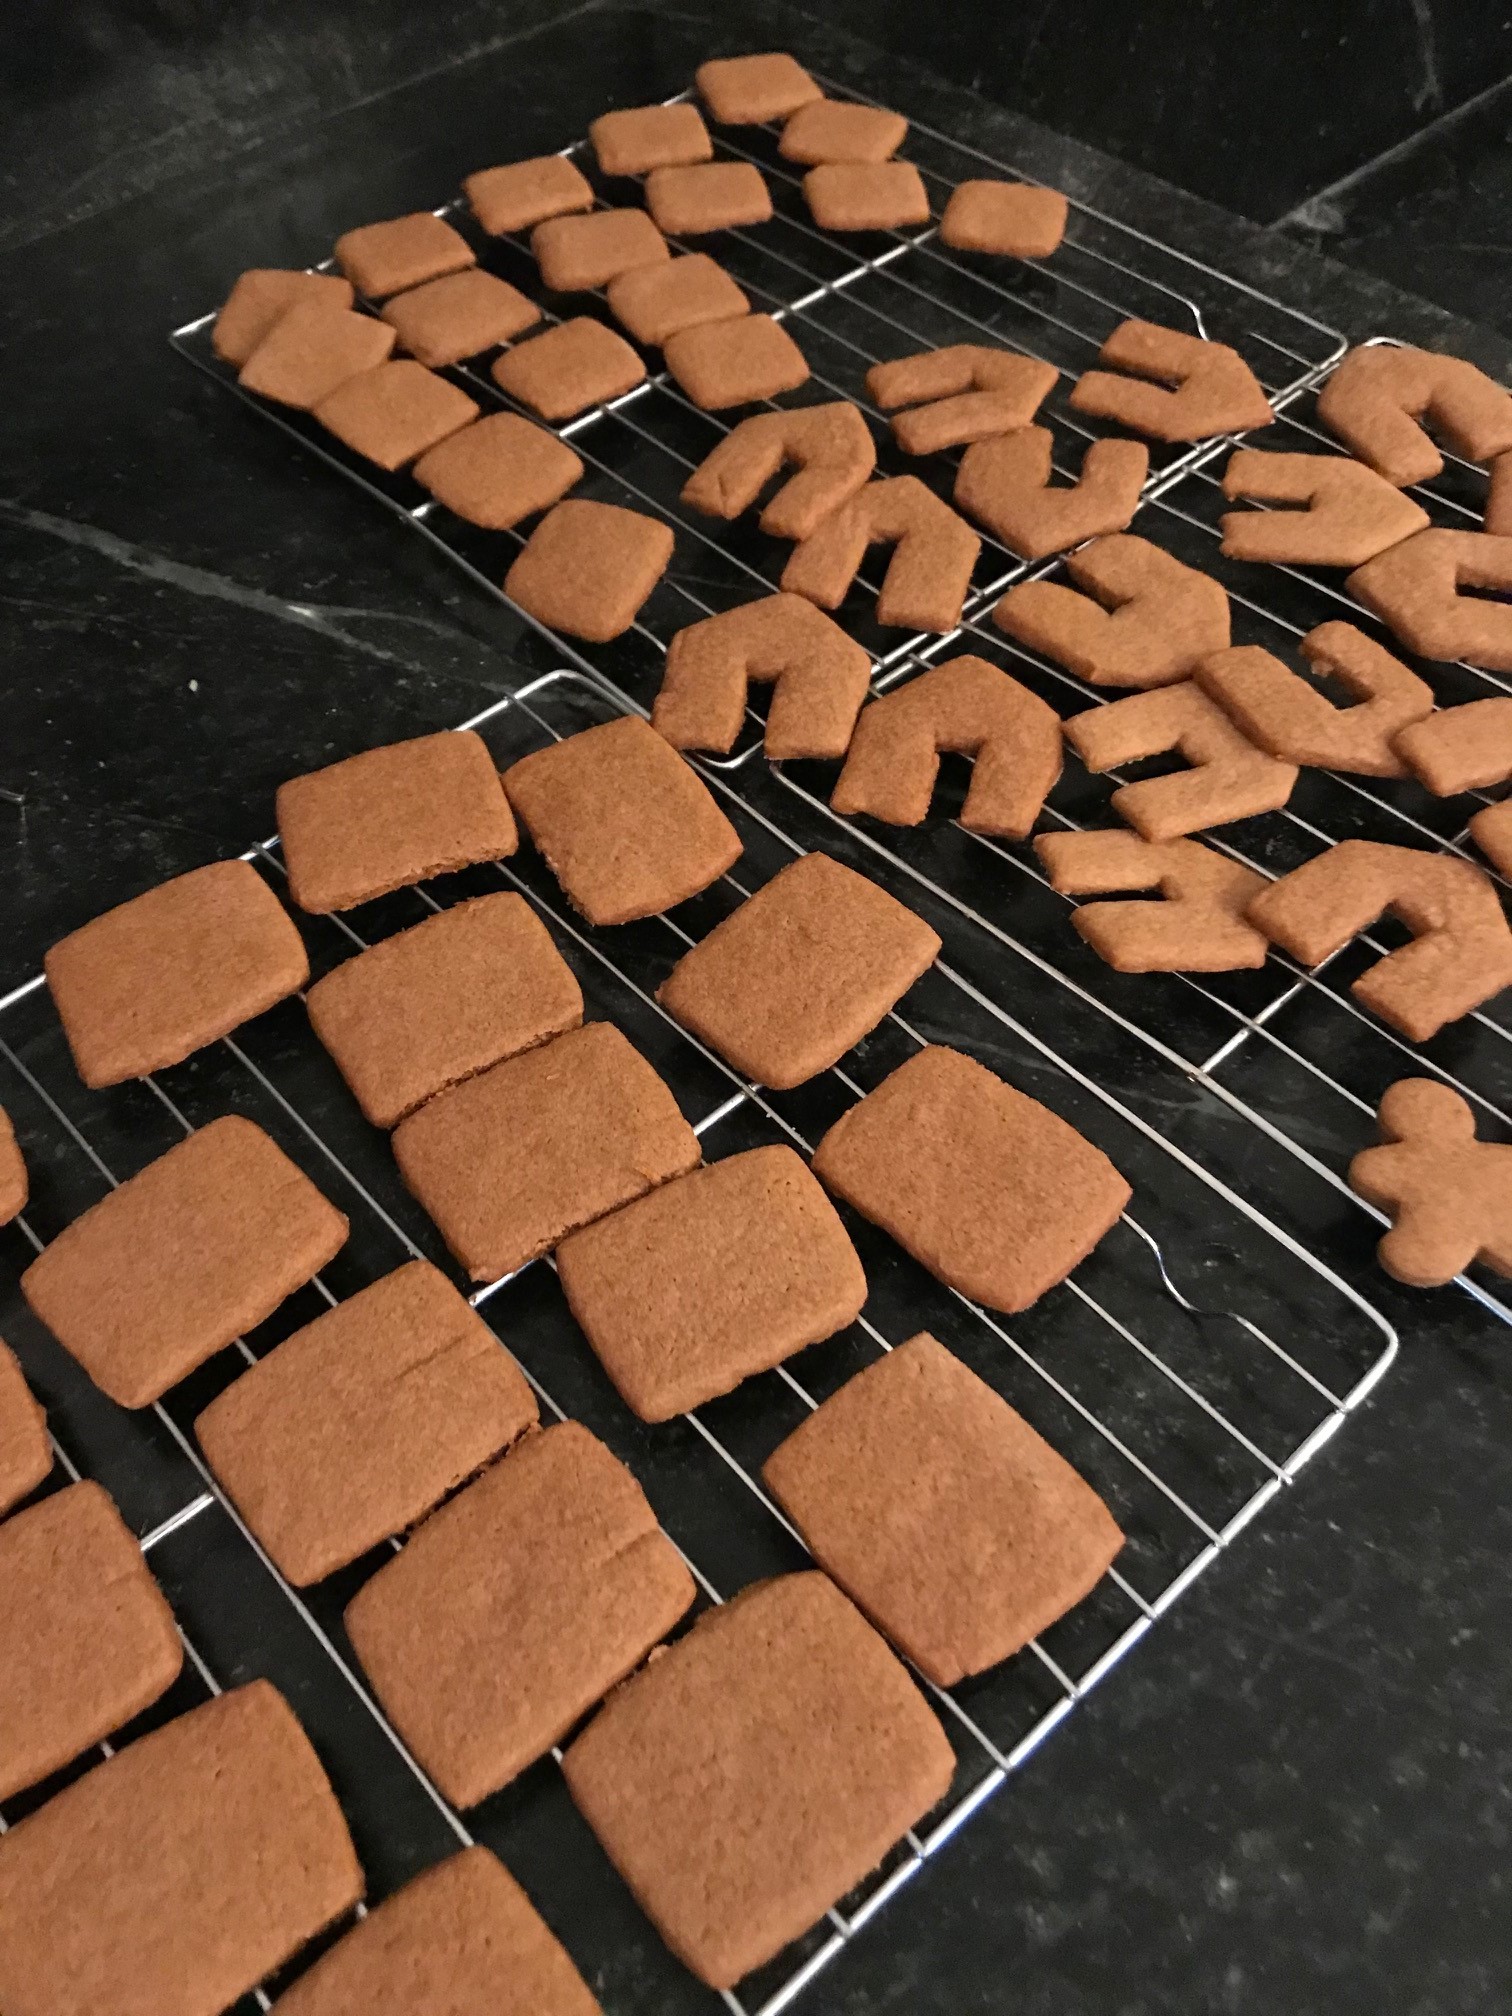
Roll out the dough on a floured surface. Using the templates, determine approx. how many houses to make, cut out fronts, sides and roof pieces using a pizza wheel. Transfer to a baking sheet with a silpat liner and bake until slightly firm, about 10 minutes. Remove to wire racks to cool.

With the royal icing, attach the sides one at a time to the front piece of the house, then attach the back. Proceed to the next so as to allow the icing to harden. Now attach the roof pieces one side at a time.

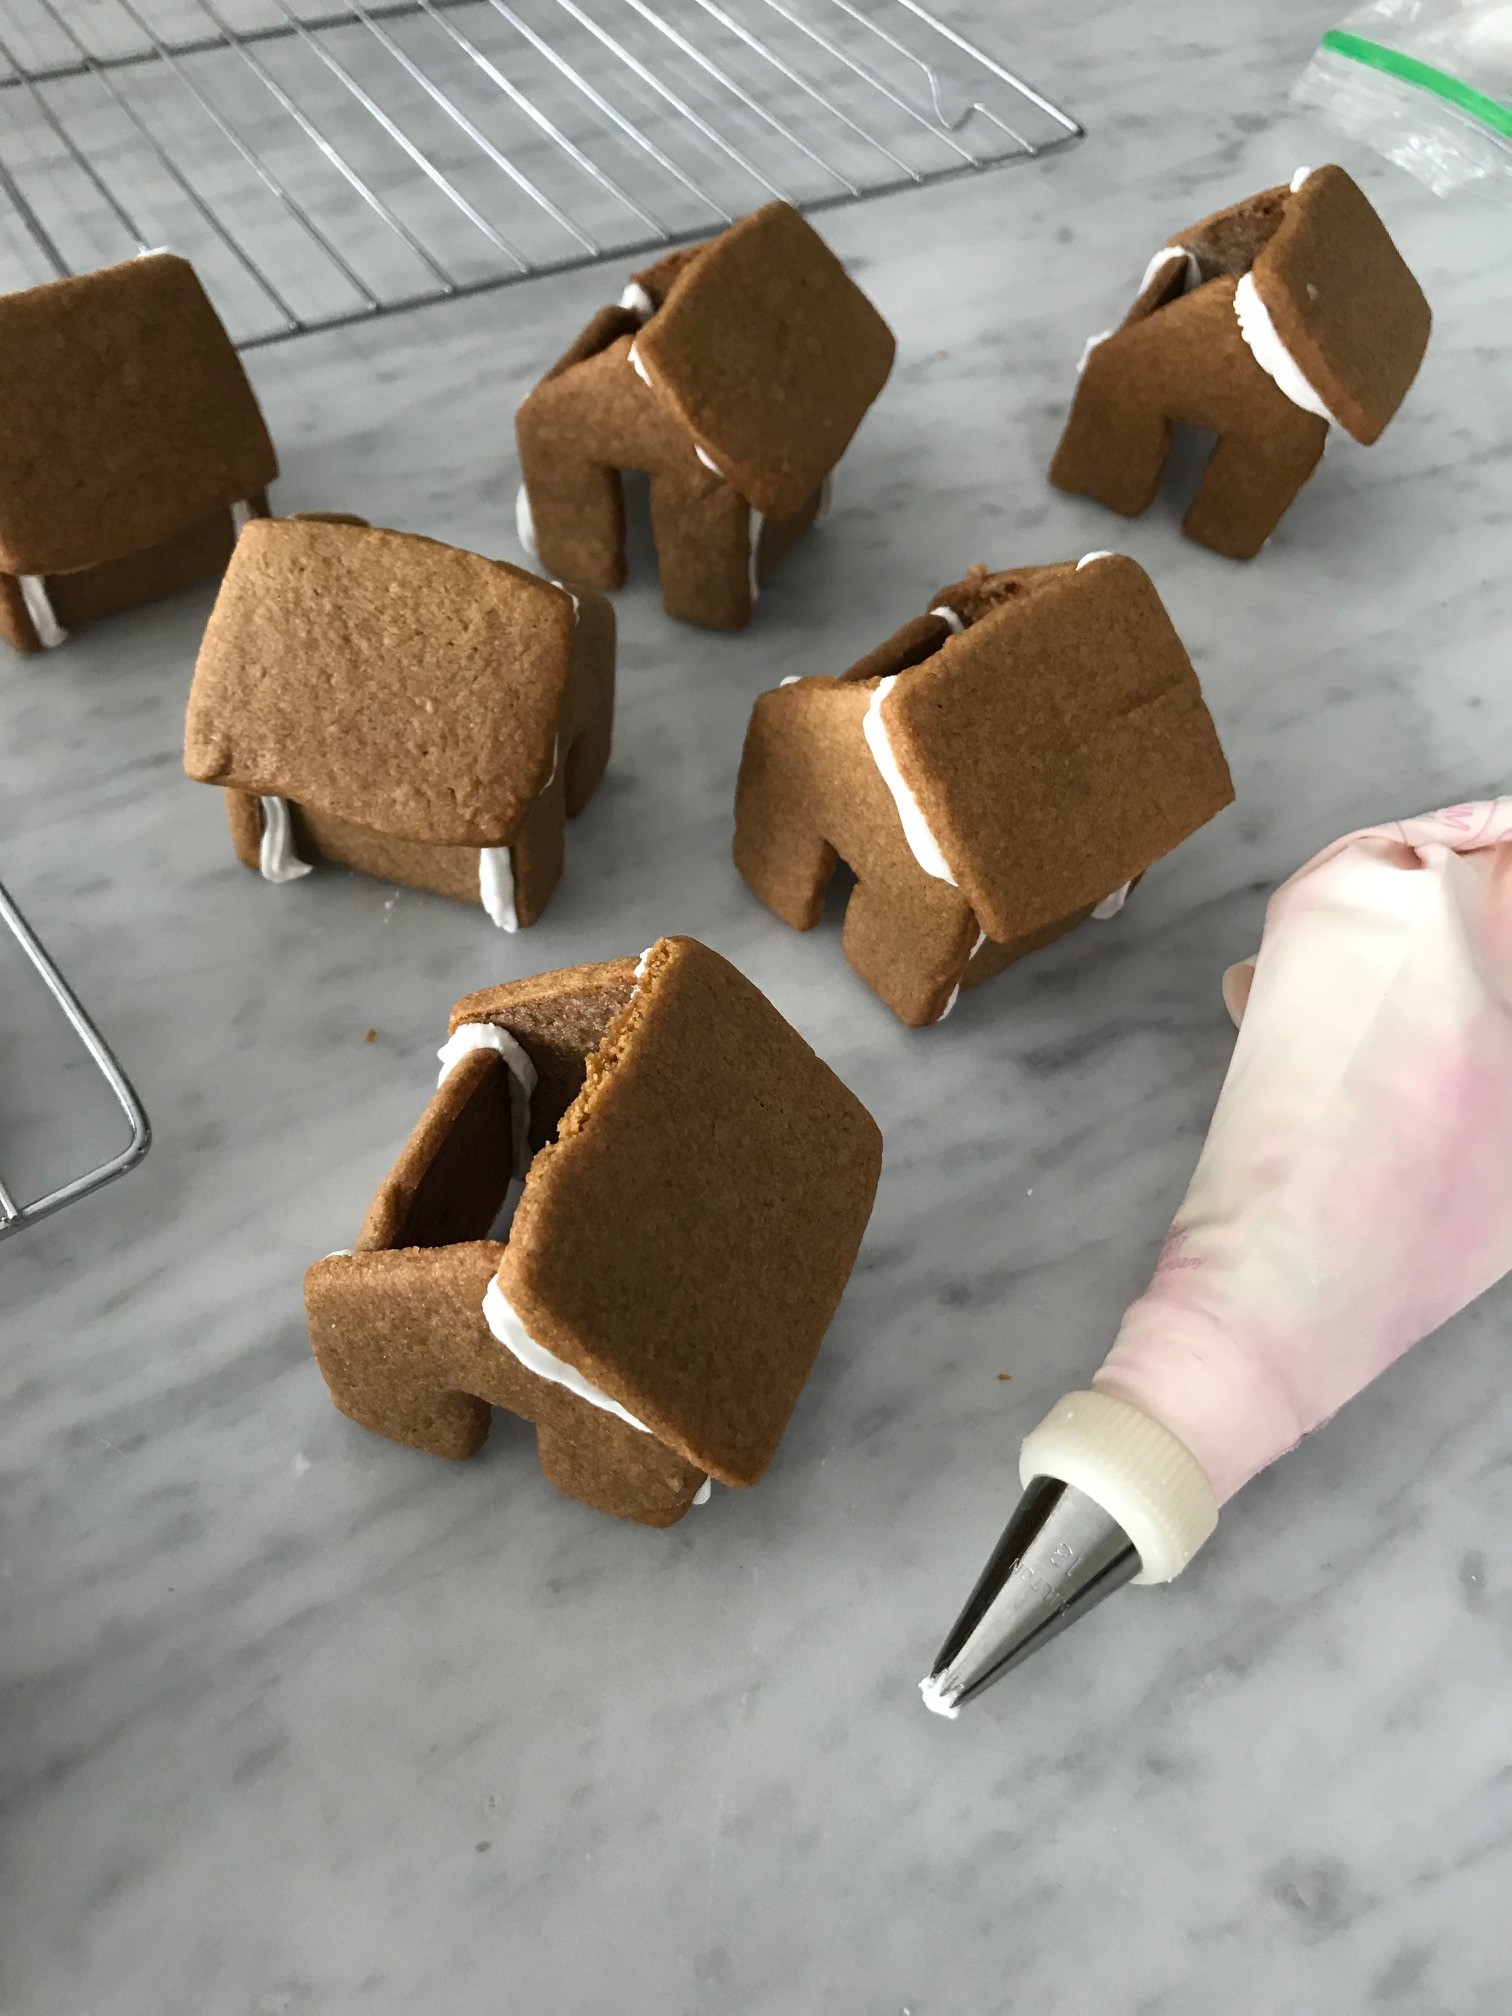 Again, allow to dry before adding the other section. This should all go rather quickly as the icing sets up fast. Allow to dry a bit before proceeding to decorate. Embellish as you desire!
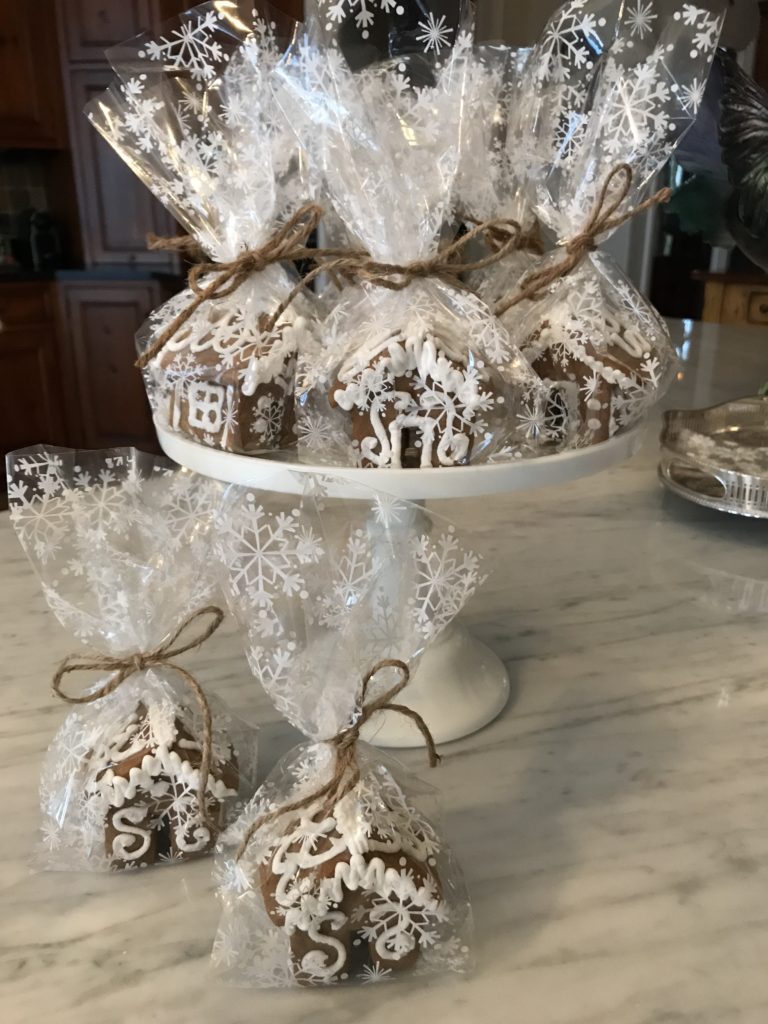
These little houses also make great party favors or gifts. Place in a cellophane bag, add a cute ribbon and there you have it!