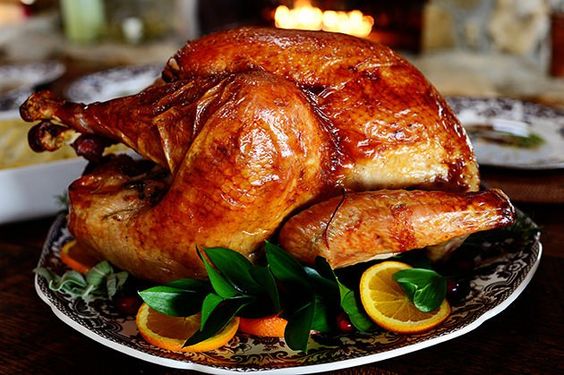
Dads Cook – Braciole
My husband loves making this recipe on a long afternoon, watching football in the kitchen, fireplace aglow. He usually doubles or triples it to freeze for meals later on.
You will need:
2 cloves garlic peeled and minced
1/2 bunch flat leaf parsley stemmed and minced
2 large eggs
3 Tbsp golden raisins
2 Tbsp shredded pecorino-romano cheese
1/2 cup seasoned bread crumbs
3 Tbsp toasted pine nuts
salt and pepper to taste
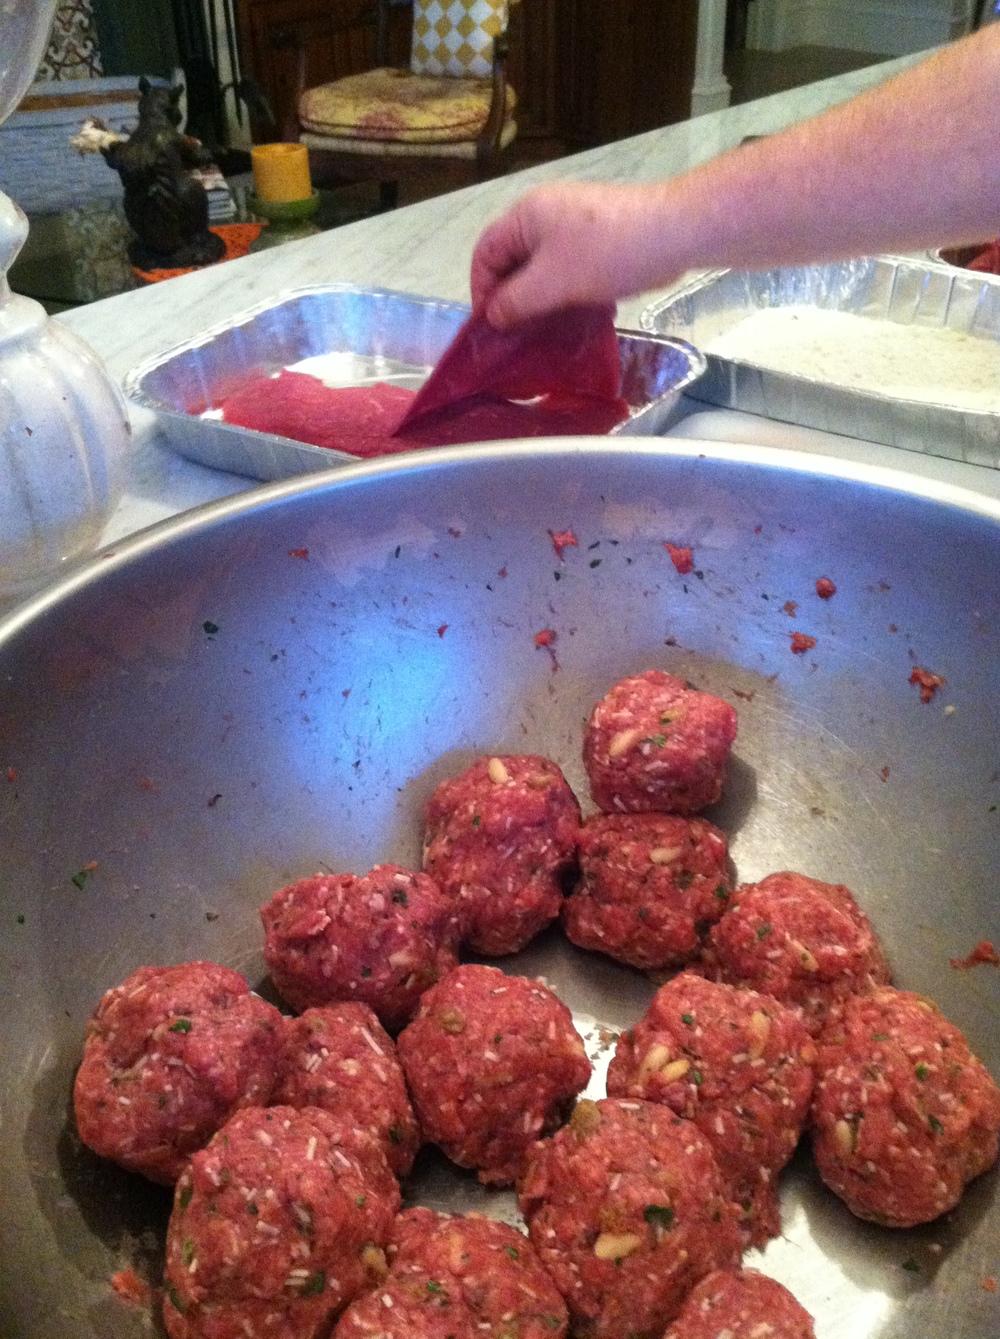
1 lb ground beef
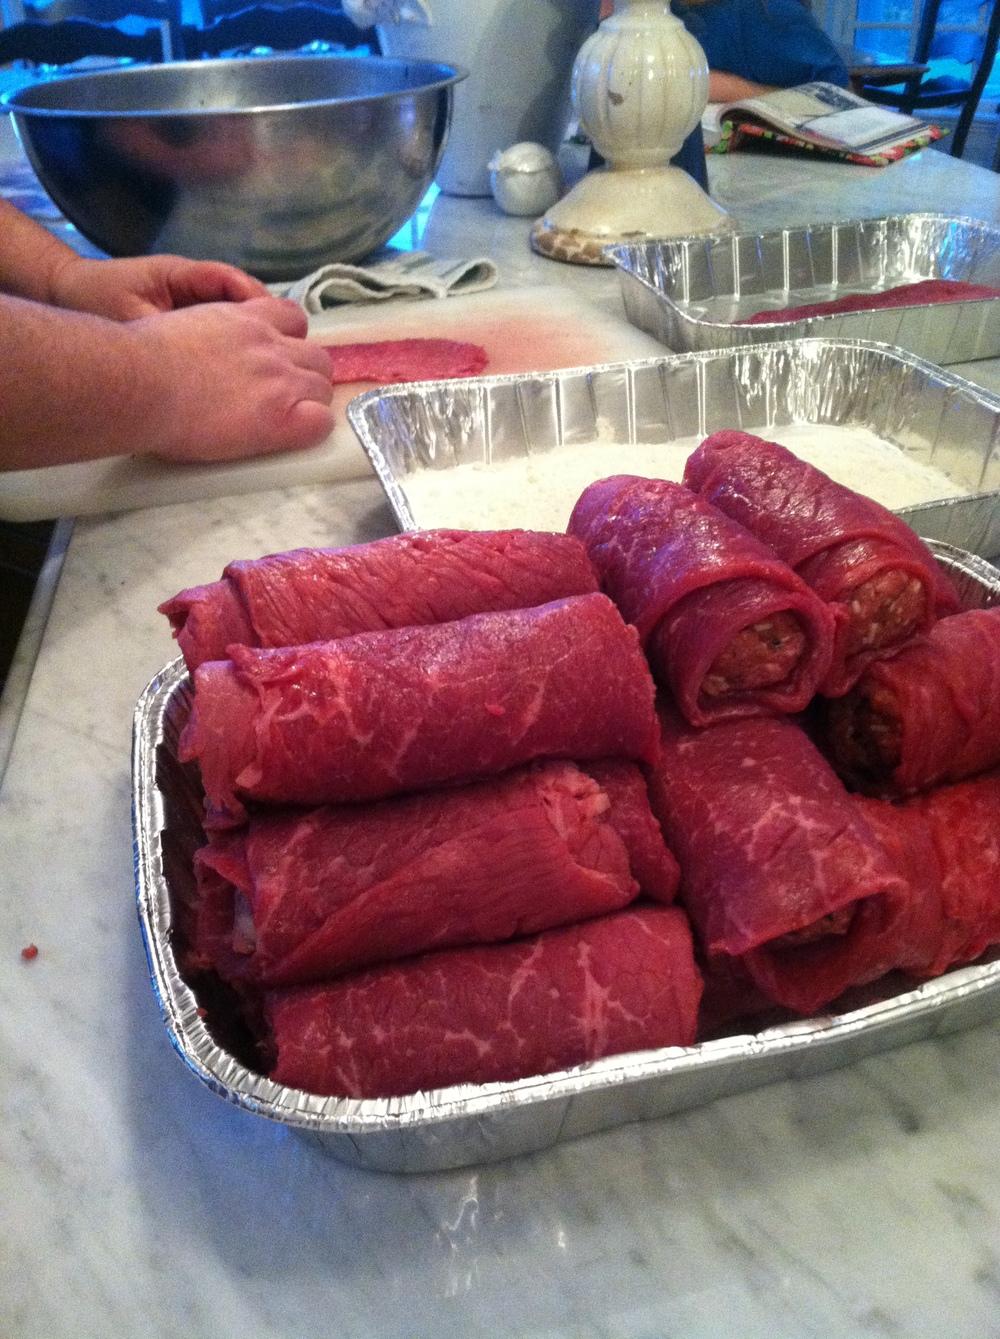
2 pkgs (1-1 1/2 lbs each) Top Round Beef Cutlets
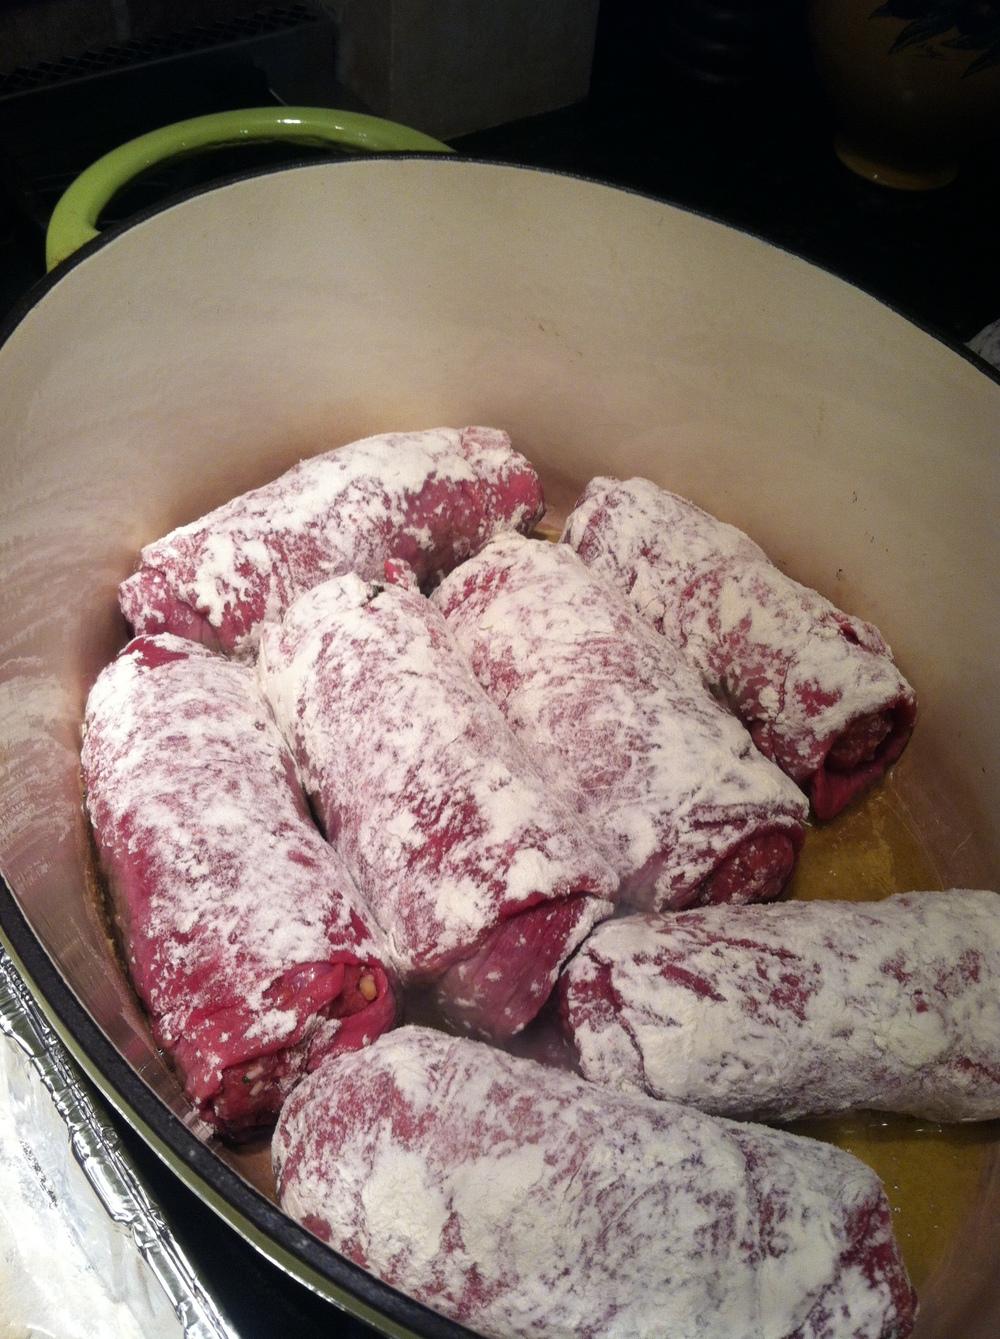
flour
2 Tbsp olive oil
1 1/2 cups dry red wine
2 jars (24 oz each) good marinara sauce
You’ll Need: Braising pan
Directions:
Preheat oven to 350 degrees.
- Prepare filling: Add garlic, parsley, eggs, raisins, cheese, bread crumbs, pine nuts, salt and pepper to ground beef. Mix well with hands until well-blended.
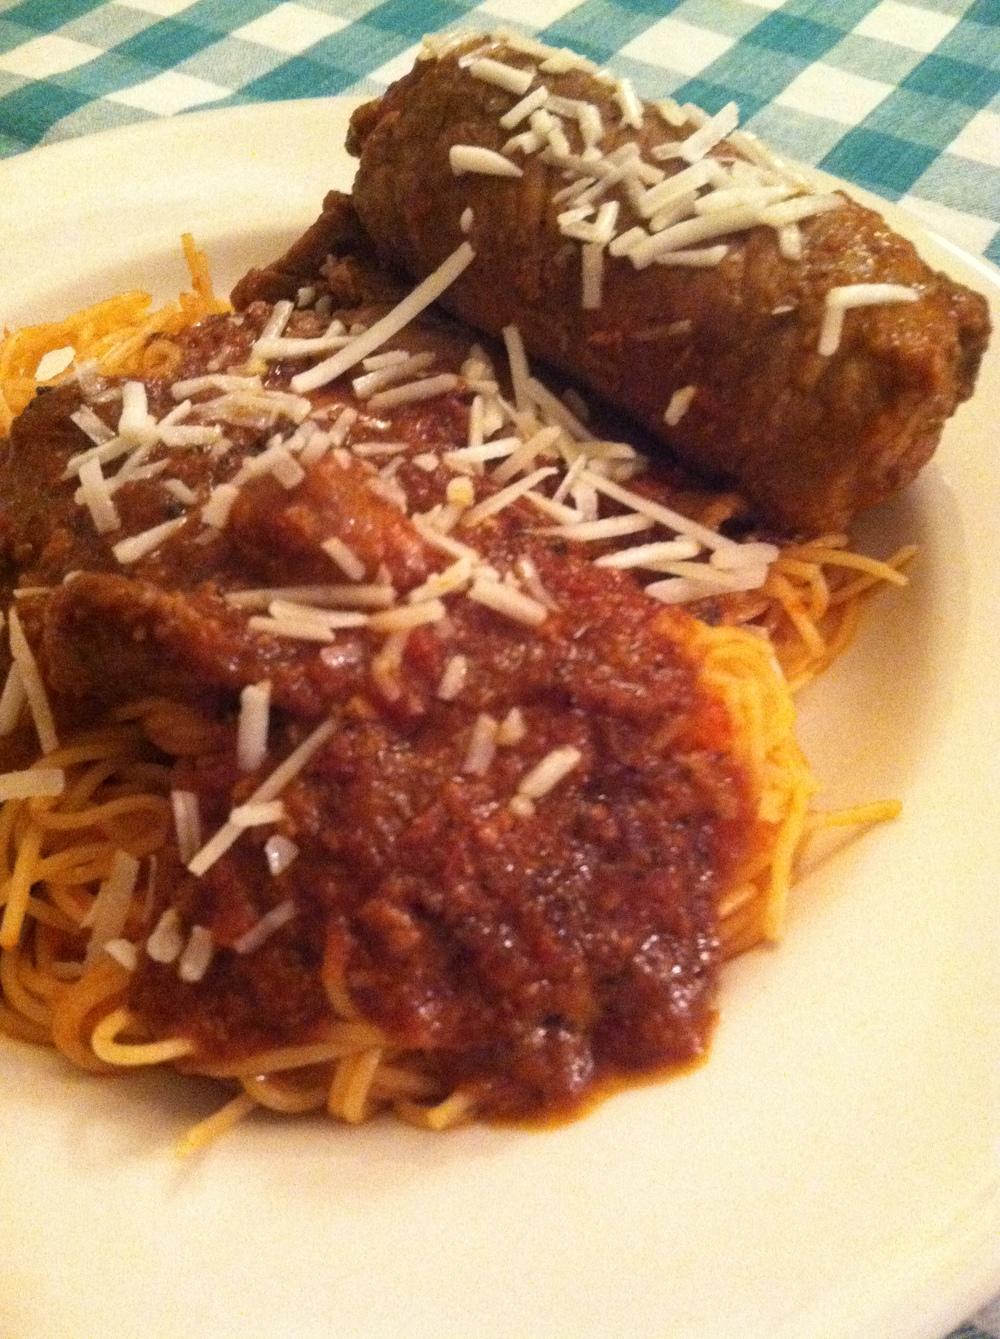
- Lay cutlets flat on work surface. Place about 1/3 cup filling on lower 1/3 of cutlet. Roll up cutlets; season with salt and pepper. Dust with pan-searing flour; pat off excess.
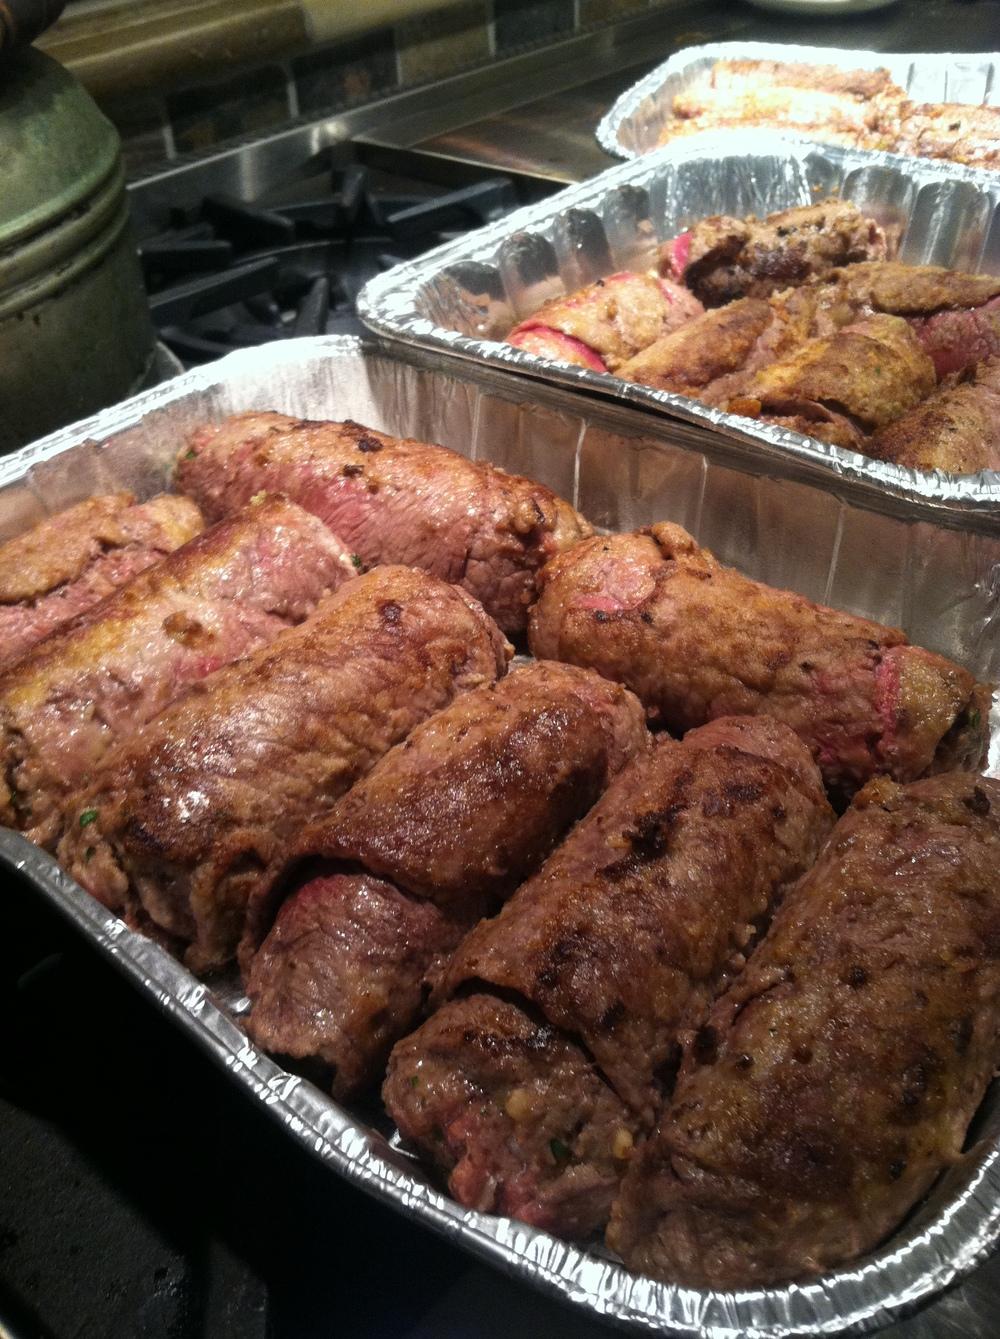
- Heat oil in large braising pan on MEDIUM-HIGH, until oil faintly smokes. Add beef rolls, seam-side down, to pan. Turn over when meat changes color one-quarter of way up and seared side has turned paper-bag brown, about 3-4 min. Sear other side about 2 min, until brown. Remove from pan.
- Remove excess drippings from pan, leaving about 1 Tbsp in pan. Lower heat to MEDIUM; add wine, stirring to loosen browned bits on bottom of pan. Add tomato sauce; stir to combine.
- Return meat to pan. Bring liquid to 180-degree simmer; check using thermometer. Cover; place in oven. Braise 2 hours, until meat is very tender.
Serve with pasta and a green salad. Enjoy!