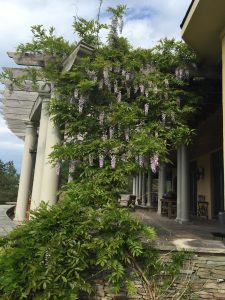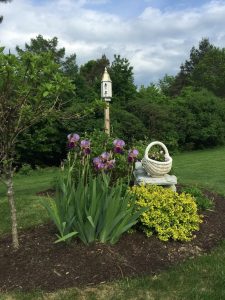
Gardening for me is therapeutic, zen for body and soul. Something about getting dirty and working the earth. Planting, growth and reaping the rewards or lack thereof, I’ve had those too! I’d like to share with you my garden adventures here. Building stone walls, putting in new flower gardens and tending to my kitchen potager. I’ll share my tips on gardening and welcome your feedback as well.
Spring in the gardens
Container Gardening
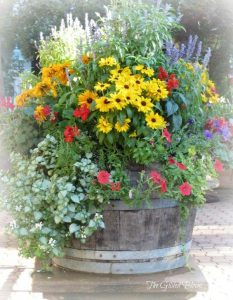
Planting in containers is a great way to add color to patios and porches and create beautiful welcoming entryways. The type of container you use does not necessarily have to be limited to traditional planting pots. Wheelbarrows, wine barrels, anything that can hold an amount of planting medium with enough room for growing roots and drainage can be used. The key to creating a lavish display – just as in decorating tabletops – is to have various heights and color. Having at least one plant variety that grows tall, a couple of ‘spillers’, those that hang down over the pot, and a couple of mounding types with lots of color, will grow into a lush display. I have also done containers with a single color story, such as purple using purple potato vine, petunias, and tall spikes for example. Be sure to use a good planting mix with fertilizer already mixed in to feed your plants throughout the growing season and have good drainage. Here are some beautiful examples for your inspiration.
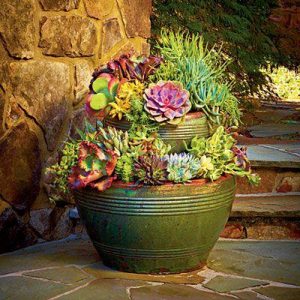
The barrel example comes from a fellow blogger, theguildedbloom. The succulents are an idea from Southern Living. When you stack pots such as the second photo shows, place a clay pot that is similar in height in the middle of the lower pot upside down, then stack the other on top. This eliminates the need to fill completely with dirt and ‘contains’ the plants planted around it.

Boxwoods traditionally do very well in containers, such as here, again from Southern Living. However, they do need some room to develop their roots. Lined up they create a privacy hedge, or grouped together in various heights a dramatic simple focal point. It can be difficult to over-winter these pots where winters are harsh. They should be moved to a protected location, which can be cumbersome. Extreme conditions can freeze both the roots of the plant and the pot, so be cautious as to the size you wish to plant if you are in these areas.
Chickens!
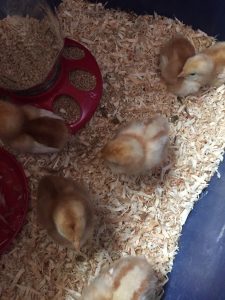
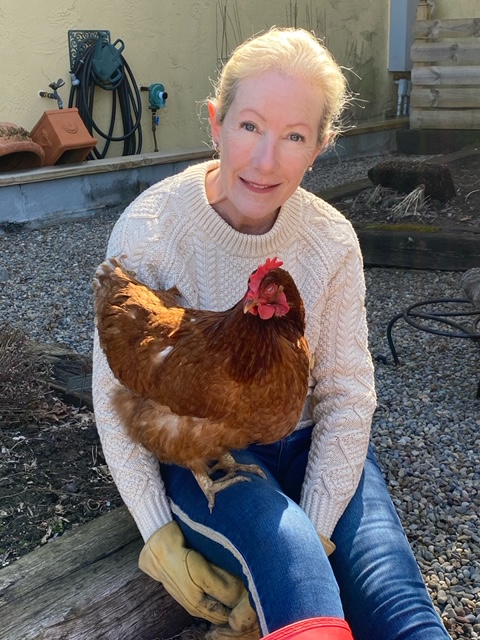
Well I’ve finally done it. I’ve thought about having hens for quite a while, but never quite took the plunge. On a trip to the farm store (for bunny bedding), I was side-tracked and before I knew it, I was on my way home with 6 chicks! They are adorable, and I’ve already learned a lot. I will keep updates on raising my little egg-layers as they grow. Stay tuned!

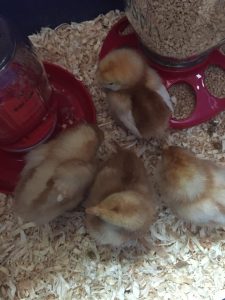
My little brood is growing nicely! They are kept warm with a heat lamp and for now are taking up residence in a recycling bin. They’re needs are simple, fresh water and food. I change their bedding every other day and for now they are perfectly content.

My little chicks are now almost 4 weeks old. They are growing feathers and love to practice flying. I put them outside every now and then to get them used to the outdoors. I don’t trust this entirely, so I have to check on them often to be sure no predators are tempted.

Still growing! I’ve moved my little hens to a temporary outdoor pen. They love to stretch their wings and attempt flying. They are comfortable sitting on a perch. Their needs are still pretty simple. Currently, I’m looking into a chicken coop. So many varieties out there! Stay tuned…

Well my little feathered friends have moved into their new home. I purchased a hen house on-line. It was a little daunting to put together, but I did it – with a little help from the kids. The chickens seem very happy and occasionally we let them out to roam, but never without someone nearby. I am still nervous about the natural predators – hawks and fox, and since I am out on some acerage, it is a very real possibility. It is amazing how fast they have grown!
Pruning Roses

I have always wondered if I was pruning my roses correctly or not. I came across this article put out by “The Garden Glove”. I found it very informative and wanted to share.
If you have roses in your garden, chances are, you need to learn how to prune them. Why prune? Here’s the thing… most roses are a lot tougher than we give them credit for… In fact, it can be pretty hard to kill a rose! But just because they can survive through a lot of neglect, doesn’t mean they will be healthy, or beautiful. Pruning helps the rose plant in three ways…
It shapes the plant, preventing it from becoming gangly and awkward.
It allows the plant to concentrate on growing flowers instead of cane, producing more, and larger, blooms.
It allows circulation of air within the plant, and removal of old and dead canes keeps disease from setting in and ruining your blooms.
All in all, if you have roses, prune them. And it’s pretty easy! Here is a quick how-to on pruning roses.
When?
Prune roses about a month before your last frost, before many new leaves emerge. In mild climates this is likely January, the colder your climate the later you prune, all the way up to March. If your rose is breaking dormancy and starting to put out lots of new leaves, you’ve waited too long, but it’s not too late to do a light pruning of dead canes, and to lightly shape the plant. (It’s always ok to prune out dead, dying or diseased wood, no matter where you are in the season.)
Tools?
Use a sharp pair of pruning shears, and make sure they are clean so they don’t pass on disease from other plants. You can always wipe your tools with a bleach solution after pruning to keep them disease free. Allow to dry thoroughly before using. Ratchet pruners are great for those who find it tough to get through those thicker canes.
What?
So the big question is, what to prune? First, where do you make the cuts?
Always cut on a 45 degree angle about 1/4 inch above a swollen leaf node. This diagram shows us how its done…

So now you know where to cut, now what do you cut?
The best choice for most gardeners is to do a moderate pruning. This helps keep the bush healthy, and produces armloads of pretty blooms for you. A light pruning might be done if you were interested in a larger bush, with more, but smaller flowers. A hard pruning, meaning pruning more than half the plant back, is often done for roses meant for show. It puts more energy into the blooms, producing larger, and more spectacular flowers.
How to do a moderate rose pruning.
Prune out all dead or diseased canes back past the damage.
Cut any interior canes that cross, or are weak growth.
Cut any suckers off at the base. Suckers are straight shoots that come out of the plant under the graft union. The graft is the large swollen rootstock at the base of the plant.
Remove about one third of last years branch growth on each remaining branch. The illustration below shows you what we mean…

Some people use a sealant on the cuts after pruning, though I have never found that necessary. Remember to always dispose of diseased canes properly and not add them to a compost pile or community yard waste container to prevent spreading the disease.
Throughout the season, lightly prune back dead and dying flowers to promote further blooming, and always cut back and dispose of dead canes or canes that prevent good shape or air circulation of the plant.
One more tip? Gloves. Leather gloves. And when you are done, you will be rewarded with healthy, beautiful roses!
Bunnies!
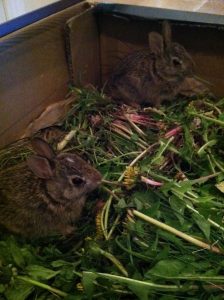
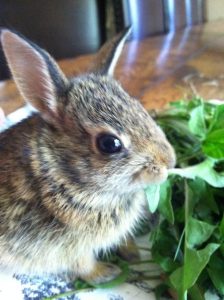
In the spirit of spring and re-birth, here is my bunny story. One Saturday morning a close friend called me. Their mother’s dog had gotten into a rabbit nest and unfortunately the mother bunny didn’t make it. Knowing that I am a self-admitted sucker for any animal, would I take the babies? Without a pause, yes. Quick to the computer to see what I would need to raise these little ones, that still had their eyes closed, approximately 7 days old. Calls to the vet and wildlife rehabilitators (which really weren’t keen on me doing this myself), gave me all the information I would need – key item needed – kitten milk dry formula. Quicker, to the pet store to procure items needed. Needless to say, this was no small task, I quickly found out that the babies needed additional heat and needed to be fed (much like a human infant) around the clock. My children happily volunteered to take various shifts through the night – remarkable, I know, but they did. After a few days the bunnies opened their eyes and were becoming more bunny-like and plumping up nicely. They were moved to a box when their fur became longer and were introduced to dandelion greens and clover – readily available in our field! As they grew it was fun to see them go from the dropper to drinking out of a dish and see them form their own personalities. And then, yes, I couldn’t resist, as the pictures below show, I had to have them pose for some adorable pictures. They were growing up and my dining room (where I kept them because I have two cats that knew something was up and I could lock them out) was starting to smell barn-like. So sadly, the time came to let my baby bunnies return to the wild, and one day we brought them outside and as quickly as you can say ‘jack-rabbit’, they hopped very quickly away into the woods and into a large rock pile that borders the open field. So their instinct kicked in, they found shelter and it was close to a food source and protection from predators. Yes, we missed the bunnies terribly and I looked for them often, but I knew they would be fine. I still think of them and like a worried mother hope they are all right.
*As cute as this story is, it is highly discouraged to raise any type of wild animal if you aren’t properly licensed or capable. The majority of wild animals that come into contact with humans, despite their best intentions inevitably do not make it. It is always best to contact a wildlife rehabilitator, names of which you can almost always obtain from a veterinarian.
Great little guide…
I found this great guide from Farming and Agriculture. I realize the dates may be sporatic, but I would say use your knowledge of the region you are in.

Indoor seed starting

Starting seeds indoors can be both satisfying and rewarding to getting out your “lack of gardening anxieties” from the long winter months. The stores are brimming with seed packets and small containers to grow them in, all coaxing us into dreaming about this years bounty. The article below is from the Burpee people and gives some great useful and general advise to starting seeds.
“It’s possible to have a fine vegetable garden by buying young plants. But you will have a much wider range of possibilities if you start your own plants from seeds indoors.
Not only is it much cheaper, but you can buy seeds for many more varieties than you will find for sale as plants. That will allow you to experiment with more different flavors, shapes and colors, and to harvest your favorite edibles over a longer period by planting varieties that mature at different times.
But many of our favorite flowers and vegetables, including tomatoes, peppers, squash and beans, evolved in places such as Central America and Mexico where they had many more hours of sunlight in their growing season that they can get in most of the United States. Their seeds will not sprout in soil that is still cold in spring and the fruits need more sun to ripen than is available in the waning days of autumn.
If you were to sow tomato seeds in the ground outdoors in May in New England, Oklahoma or Minnesota, the plants would take so long to grow that the first frost in October would likely kill them before you got a single ripe tomato.
Even for crops that don’t come from near the equator, starting seeds indoors gives plants a head start that brings earlier harvests and greater yield.
The same is true for many of our favorite annual flowers. If you start them indoors, they can spend more time in your garden flowering instead of getting mature enough to flower. Even many perennials benefit from a good head start indoors.
For your first experience of starting seeds, it’s wise not to take on too much. Start a couple of dozen plants in three or four varieties while you learn how it all works.
Different plants have different needs, so consult the seed packet to find out how many weeks each variety will take to get ready indoors before your last frost date.
Many vegetable seed packets state a number of days to maturity, such as “65 days” or “80 days.” Make sure you know whether that means days from sowing the seed or days from transplanting outdoors; it varies from vegetable to vegetable.
Starting seeds is not complicated or difficult, if you understand the process. The basic ingredients are a proper growing medium, containers, light, warmth, water and attention.
Growing medium. Seedlings are very delicate. For the best chance of success, start them in a fresh, sterile seed-starting mix that is light and fluffy to hold just enough moisture. If the growing medium is too wet or not sterile, disease can strike. If it is too heavy or sticky, fine new roots won’t be able to push through it.
You can use bagged seed-starting mix, or buy compressed pellets of peat or coir (coconut husk fibers) that expand when wet. Since seeds contain the nutrients the seedlings will need, fertilizer isn’t important in your seed-starting mix.
Containers. Anything that will hold the growing medium will work. You can use cell-packs or pots from last year’s annuals, yogurt cups or other found containers. But you must clean them and sterilize them in a solution of 1 part bleach to 9 parts water. Make sure they have good drainage holes so excess water can drain away. And get a shallow waterproof tray that will hold them.
There’s no point in using containers more than 3 to 4 inches across, since you will be transplanting the young plants to the garden (or container garden).
Another alternative is pots that break down in the soil. You can plant them right in the garden and avoid disturbing the young plant’s roots. Some are shaped from compressed peat or coir, or you can make your own from newspaper. Don’t confuse these with biodegradable resin pots; those will break down in a landfill or, eventually, in a compost heap, but you can’t plant them in the garden.
Seed-starting kits are readily available and can be a big help. They usually include an attached set of good-sized containers, a tray to set them on and a clear lid to hold in humidity during the early stages.
Large-scale gardeners often do a two-step: They closely sow seeds in a shallow tray until they sprout, or “germinate.” Then they gently prick the small sprouts out and transplant them to larger containers. This saves germination space if you are starting seeds in large numbers, but it isn’t necessary. A beginner starting a modest number of seeds can germinate them right in the containers in which they will grow to transplant size.
Light. Seedlings need lots of light or they will be stalky, spindly and feeble. A very sunny, south-facing window may do for a handful of plants if you are not too far north. But most gardeners use artificial lights so they can raise more plants and make sure they get enough rays.
You can buy specially-made plant light setups for anywhere from $80 to $500, depending on complexity and capacity. But many gardeners do just fine with inexpensive T-12 or T-8 fluorescent shop lights from the home improvement store.
To provide a wider spectrum of light, use one cool-white tube and one red-light tube in a two-tube fixture. Newer-fangled T-5 tubes deliver more light from a single tube but are more expensive and require a special fixture.
The crucial thing is to rig the light fixture so you can raise it. You must keep the lights just 3 to 4 inches above the plants as they grow. That’s why incandescent light bulbs won’t work; if they are close enough to give a plant a useful amount of light, their heat will destroy it. Fluorescent bulbs give more light but stay cool.
Most often, a shop light is hung from open-link chains with S-hooks. As the plants grow, the light can be lifted link by link so it stays right above the plants. You can hang the light from a basement ceiling, from a home-made lumber frame or even under a table, with the plants on the floor.
A lamp timer will take over the chore of turning the lights on and off so the plants get 16 to 18 hours of light every day and a good rest at night.
Warmth. Seed-starting happens in two stages: germination and growing. Germination is the sprouting stage, when the embryo of the plant emerges from the seed. You won’t need light at this stage, but you will need gentle warmth (not harsh heat). Provide it by setting the containers on top of a refrigerator or dryer; by propping them a few inches above (not on) a radiator; or by using special heating mats sold for the purpose.
Once you see green sprouts about half an inch tall, you will move your plants under the lights in a cooler environment–about comfortable room temperature, between 60 and 70 degrees. A cold garage won’t do; neither will a broiling furnace room.
Water. Plants consist mostly of water and they need it for the photosynthesis that gives them energy to grow.
Sow the seeds in moistened mix. Cover the containers to hold in humidity while the seeds germinate–with the cover from your kit, or with a loosely fastened plastic bag. Once they sprout, uncover the containers and water them from the bottom, by pouring water into the tray. Never water the seed-starting mix from the top; that courts disease (especially a fungus disease called “damping off”) and may dislodge or damage the sprouts. Make sure air circulates freely so humidity isn’t trapped around plants.
So-called “self watering” seed-starting kits are helpful in keeping the water supply steady. In these arrangements, the containers sit on a fiber mat that wicks just enough moisture from a reservoir. These kits aren’t magic, though; you still have to keep that reservoir filled with water.
Attention. This is the secret ingredient to successful seed-starting. You’ll need to check daily: To see if the seeds have sprouted; to remove the cover when it’s time and move the sprouts under lights; to make sure they stay properly moist; to keep a self-watering reservoir full; to raise the lights so they stay just the right distance above the plants; and to make sure the lights and timer haven’t malfunctioned. If you are starting a few seeds on the windowsill, turn the plants every day so they don’t bend toward the light.
As you plan your seed starting, factor in your convenience and habits. Will you really remember to check seeds in the basement daily? It might be wiser to start seeds in the guest room or kitchen where they will be handier, even if you have space for fewer seedlings.
As your seedlings grow, watch the weather. Although a few crops can go outside earlier (read the seed packet), most should stay indoors until after the last frost date for your area has passed and your soil has warmed. If your area is having a cold spring, hold off.
Gardeners are always eager, but many a carefully nurtured tomato seedling has been killed by a May frost or simply slowed down by cold soil. Protect your investment of time and attention by planting later rather than earlier.
Then introduce your plants to the outdoors gradually, a process called “hardening off.” For a few hours one fine spring day, then a few hours more the next, give your plants a taste of the outdoors, but bring them in at night. After a week or so, they will have acclimated to the outdoors and will be ready to transplant.” …..Burpee
Growing Container Citrus Trees
I purchased a potted tangerine tree many years ago at a ‘garden club’ event. I was so enticed by the beautiful fruit hanging on this lovely small sized tree, I was a little intimidated but just had to have it. To my huge disappointment, after a few weeks it started to drop it’s leaves, more and more every day. However, I was not to be discouraged. It was winter and I was going to give this thing a chance. It turns out that my tree was just adjusting to “life” so to speak, in my home. It had come from a greenhouse, was transported in a cold van to my home and was aclimating to being in a new location. Over the years my tangerine tree blossomed into a beautiful container tree that provided me with both fragrance and fruit. Unfortunately, my beautiful tree met an untimely demise due to one of my newest kitties deciding that its’ pot made a fabulous ‘organic’ litter box. Regardless, I owned my tree for over 12 years and I learned alot from it. Here are some pointers for growing container citrus trees.
Citrus do terrific in containers, this is what makes them such a pleasing choice for patios and indoors. The meyer lemon is the most popular patio citrus tree because it is almost always either in bloom or producing fruit. The fragance of these trees in bloom is exceptional and when they do produce fruit, it is truly very satisfying.
Be sure that your ‘tree’ is in an adequate size pot with drainage. A 9 – 12″ diameter pot is usually sufficient for a smaller sized tree (3-4′ tall). Be sure to use a good soil mix with ample nutrients. Water just to maintain moisture. Avoid over-watering.
Here in the northeast, I move my tree outdoors as soon as the sun starts to feel strong, usually around mid-april. My rule of thumb is this: remember this is an ‘outdoor’ tree, as long as the temperatures are not too drastic (below 35F min.) it should do fine, as long as there is plenty of warm sunshine the next day to compensate.
If you live in a warm climate, you can leave your container tree in a sunny location, outdoors for most of the year. Citrus trees are fairly hardy, but I recommend bringing them indoors when the temperatures begin to flirt with freezing. I usually leave my citrus trees outside for as long as possible since natural unfiltered sunlight is always best. When the days and evening become colder, usually about towards the end of October, I bring my trees indoors. When you do bring your tree indoors for the winter, be sure it is in the southern-most facing window.
Your tree may go through a leaf drop. This usually occurs when there has been a major change in it’s environment, such as bringing in for the winter. Don’t be alarmed. Your tree will re-accustom itself. Feed occasionally with a fertilizer.
Go Natural!

I love to use pine boughs and such from the trees and plants on my property. This year I collected white pine branches, some different types of spruce and larch tree branches with the pine cones attached. The red branches are wild red twig dogwood – not the variety you get at the nursery, but the wild variety that grows in abundance here in the northeast, and the berries are from wild raspberry vines – warning, they are extremely sharp, but the berries are so hardy and so vibrant in color it’s worth the effort. Use a variety of shapes and textures and of course, height, to make your display impressive.
Important Fall Garden Advice!
I refer to my garden-blogger companions to give their sage advice, and I am constantly amazed at how much more information there is out there. Here are some terrific tips that came from the empressofdirt.net.
Fall garden tasks are often ignored as we instinctively retreat to the indoors as the weather turns colder, letting the garden fade out.
However, if you can muster the enthusiasm/long johns, the payoff is quite fabulous: healthier plants and soil, gorgeous spring bulbs, masses of fresh garlic in the new year, productive bees, and more.
I hope you’ll find some helpful ideas as well as some new favourite blogs to follow.
Let’s get started with healthy soil. Here’s a few ideas:
1. Pine Needle Mulch | Our Fairfield Home & Garden
- Pine needles make wonderful garden mulch. Organic mulches serve several purposes: they protect the soil during the winter, provide habitat for worms and friends (lots of insects and beneficial bacteria), and gradually break down to add structure and enrich the soil.
- There’s a common gardening myth that the acidity of pine needles is harmful for a garden. Not true! By the time the needles break down, the acid level is insignificant, and there’s plenty of goodness in there.
- See more of Barb’s tips on Tucking In The Winter Garden here….
2. Cover Crops | Learning & Yearning
- Cover crops are plantings used to protect and enrich the soil. You may have noticed farmers using these crops on their fields during the winter. The plants are not actually harvested for consumption but instead are incorporated into the soil, the same way we add compost.
- Cover crops can be planted in the home garden with the same benefits.
- Susan is experimenting both with cover crops and a no-dig garden method for super healthy soil. Find out which cover crop she’s using here: Cover Crop In A No-Dig Garden….
3. Leaves Are Gold In The Garden | Empress of Dirt
- Somehow this crazy tradition started where we rake up leaves, bag them, ship them away, and then buy the equivalent soil enricher in the spring.
- Leaves are actually an incredible resource, providing free mulch for the garden with no shipping involved. Smart and free!

