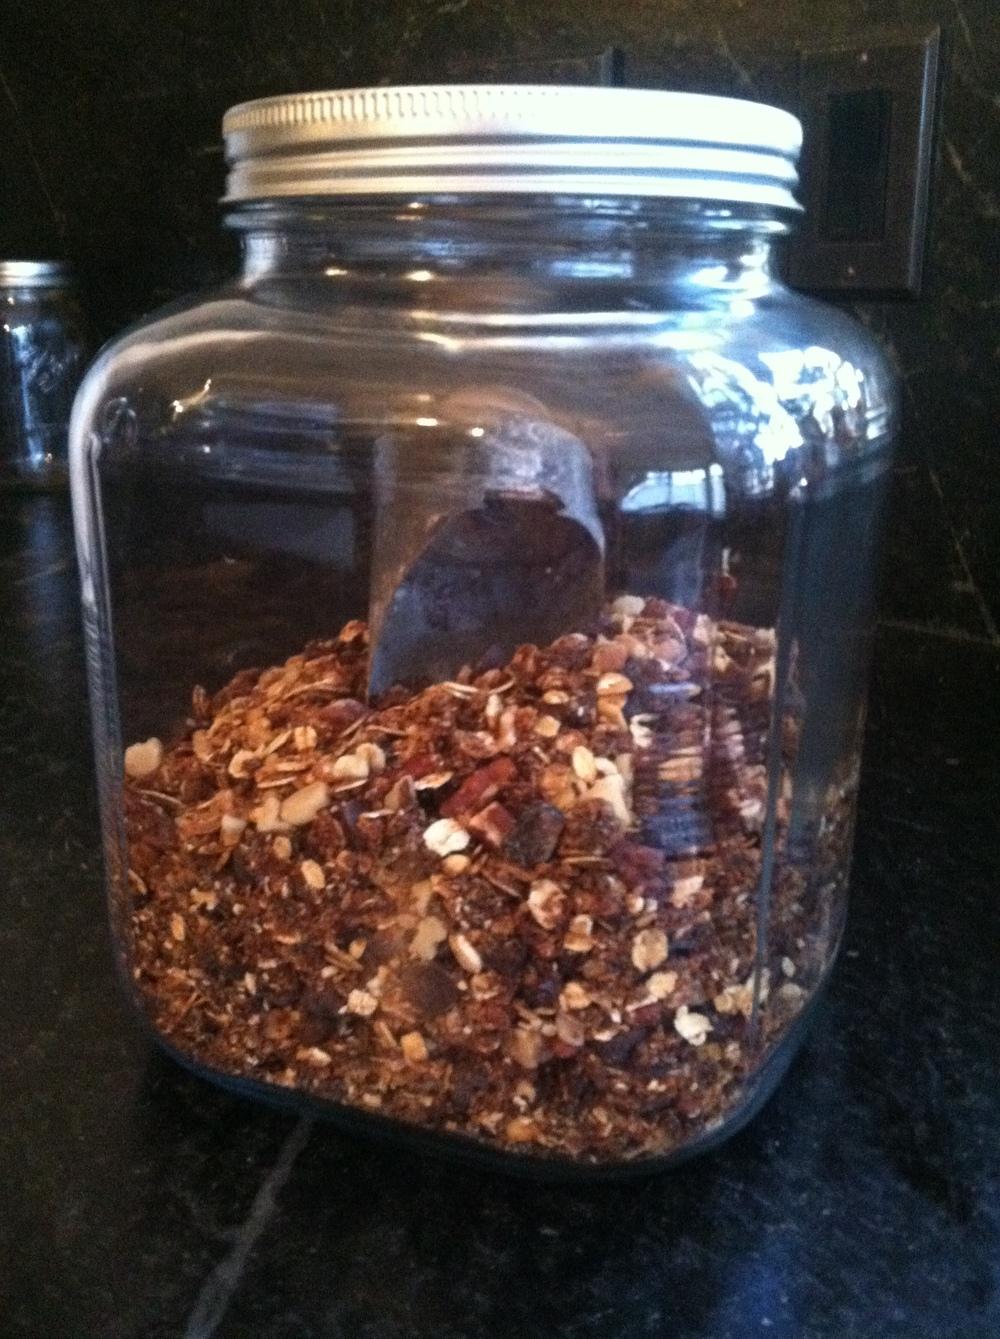
Applesause

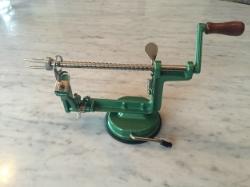
Almost everyone has their own recipe for applesauce.  Mine is hardly a recipe at all, just easy instructions as to what I do to make it.  Regardless of what your recipe is, this tool is ingenious and makes peeling, slicing and coring apples super quick work. Look for the link below to order!

Anyway, we just peel, slice and core apples.  Place in a large heavy clad pot.  I like to add just a little water to get the steam process going.  Sugar is optional and depends on the sweetness of the apples.  You can always add sugar after if you feel the sauce is too tart.  I add a good amount of cinnamon.  Cook on low heat until the apples are bubbled down and very soft.  When cooked, use a potato masher or something similar to mix up the sauce.  I use an immersion blender and blend the sauce smooth.  This is completely optional since some people like thick clumpy applesauce and some like it smooth – like me.  Regardless, this is a great activity to let the kids get involved in since they love operating the peeler and mashing the apples and the results?  Instant gratification!

Limoncello

In my “Things I’m Loving Now” section, I mentioned Limoncello.  This is a traditional Italian apertif that is gaining wide popularity.  While you can readily purchase it, to make it home-made is much more satisfying and absolutely simple.  While there are dozens of recipes out there, they all have the same basic ingredients and steps involved.  I found this one on a site dedicated to Limoncello called Limoncelloquest!  This is the basic recipe, if you want the lengthier version, which really just is commentary on things such as how to zest, recommendations on the types of lemons and more detailing in the actual procedure.  If you feel confident enough, just follow this recipe.

Standard Limoncello Recipe

Ingredients:

2 750ml bottles vodka

The zest of 17 lemons

3.5 cups of white sugar

5 cups of water

Instructions:

Zest the lemons, put them in a glass one-gallon jar with the vodka and let it sit for 45 days. Then filter the mixture 4 times using #4 coffee filters. Mix the sugar and water in a pot and bring to a boil for 5 minutes. Let the mixture sit until completely cool and then mix with the alcohol and lemon infusion. Let that mixture sit for 45 days. Bottle the liquid and put it in the freezer.

Easy Homemade Tzatziki

My husband and I honeymooned in the Greek Isles.  Every meal was eaten alfresco.  We became so accustomed to this that when we returned home, it felt strange to be eating inside!  I will never forget the delicious tomato salads, warm from the sun.  However, it was the tzatziki that I became obsessed with.  Back then, it was not to be found in stores so I developed a recipe that captured that tangy, fresh flavor.  This was before greek yogurt, so I used to strain plain yogurt for 1/2 day to remove the whey liquid – resulting in greek yogurt.  Now with greek yogurt aplenty, we can eliminate that step.  This recipe is so simple, it can be made in minutes.  Serve with pita cut up as a dip or an accompaniment to veggie burgers or falafel.

2, 5oz. containers good quality greek yogurt – drain any liquid on top before using

1/2 cucumber peeled and grated.  Squeeze with the back of a spatula to drain off excess liquid

1 large clove garlic, crushed

2 tbsp. extra virgin olive oil

course ground sea salt and pepper to taste

Mix all the ingredients together until blended.  Serve chilled.  Enjoy!

Homemade Granola

This is a terrific natural granola just perfect for topping yogurt or even ice cream.

3 cups of old fashioned oats

1 cup wheat germ (honey crunch or regular)

1/2 cup chia seeds

1/2 cup chopped nuts – your choice, pecans, walnuts, hazelnuts…

3/4 cup cinnamon chips

1/4 cup packed brown sugar

1/2 cup honey

1/2 cup each raisins* and chocolate or butterscotch chips

In a large bowl mix all ingredients together thoroughly except the raisins and chocolate chips. Spread on a baking sheet and bake in a 350F oven for approx. one hour, checking every 15 minutes or so to toss so that the granola toasts evenly.  Remove from oven and let stand to cool thoroughly.  Add the raisins and chocolate chips. Transfer to a tight fitting container only after thoroughly cooled.

*Dried cranberries can be added instead of the raisins if desired.

My Often-Requested Oatmeal

This is simple, really, but honestly, oatmeal is so very satisfying.  In this day of instant everything – including oatmeal, some are a little daunted still by making it from scratch.  Well put all worries aside, oatmeal is a dish that cannot be flubbed. Perfect for those chilly mornings, whether off to school, or the ski hill, this will warm like nothing can.

Forgive me for the random measurements, but like I said, you cannot flub this.

In a heavy pot on stove, bring approx. 4 cups of water to a boil.  When in a rolling boil, turn down the heat to medium and stir in about 2 cups of plain oatmeal (whole or regular oats). Add in 1/4 cup of packed dark brown sugar, 1/2 tsp. cinnamon, 1/4 cup (or a little less if you like the oatmeal less sweet) maple syrup, raisins and chopped walnuts to desired amount.  My family likes plenty of raisins.  Turn heat to low and continue to stir.  If oatmeal gets too thick, just add more water.  If too thin, simply add a little more oats.  Oatmeal will thicken the longer it sits at the stove. Serve in deep bowls drizzled with extra maple syrup.

Pine Cone Cheese Ball

This is such a clever idea – Herbed cream cheese, easily shaped into these adorable pine cones, add a sprig of rosemary and your done.

2 8oz. packages cream cheese, room temperature

1 small package Boursin cheese, herbed

approx. 2 cups whole almonds

sprigs of fresh rosemary for garnish

Mix the softened cream cheese with the boursin.  Shape on a plate into a round with a point.  Starting at the top of the pine cone, press the rounded side of the almonds into the cheese in rows to mimic the spikes of the pine cone.  Garnish with rosemary.

This recipe is enough to make 2 small pine cones as above or one large.

TIP – blanched almonds can be used as an alternative to the whole almonds, but you will need a little more patience to get the same effect.

Cranberry Relish

I’ve been making this recipe since I was a teenager – it has always been a favorite.  What makes it even better?  You can make it days in advance, because actually the longer it sits, the better it gets!  What could be easier – one less thing to worry about on Thanksgiving day.

2 bags of fresh cranberries, washed and drained.

Place in a food processor with the knife blade and process until the cranberries are roughly chopped.   Continue to process, adding 1 – 1 1/2 cups sugar (I give the room for a little more, because some like it sweeter, and other prefer the cranberries more tart.  Use your discretion here.  (If your not sure, go with the lesser amount, more can always be add later).  Process until completely ground and the cranberries resemble a lumpy applesauce.

Transfer to a bowl and stir in 1/2 cup raisins and 1/2 cup chopped walnuts.

Allow to sit at least overnight for flavors to blend and the raisins to plump up.

Toasted Pumpkin Seeds

It’s a tradition at our home to toast pumpkin seeds after carving our Jack-O-Lanterns.  So simple and healthy too.

You will need:

pumpkin seeds (at least 3 cups)

3-4 tablespoons olive oil

1 tablespoon McCormick’s Grill Mates Montreal Chicken seasoning.

salt and pepper to taste

Clean and wash pumpkins seeds removed from pumpkins. Place in a colander to remove excess moisture. Place in a large bowl and add olive oil and seasonings, mix well.  Spread onto a non-stick cookie sheet and roast in a 350F oven until lightly browned.  Be sure to check occasionally and mix them up so that they toast evenly.  Allow to cool and enjoy.